Bitbucket 서비스 구성 및 설치 가이드
1. Bitbucket 개요
Bitbucket은 개발자들이 코드 관리 및 협업하기 위한 플랫폼으로, 코드 저장, 변경 사항 추적, 원격 컴퓨터 배포, 다른 개발자들과 함께 작업 및 리뷰하는 기능을 제공하고, 엔터프라이즈 레벨의 기능들로 개발 절차를 개선하고 효율적으로 관리할 수 있도록 도와줍니다.
2. Bitbucket 구성 개요
본 가이드 문서에서는 Bitbucket Application 7.21.7 LTS 버전을 사용합니다.
Bitbucket을 사용하기 위해서 Bitbucket에서 사용할 DB 구성을 진행합니다.
이후 Bitbucket 인스턴스를 구성하고 Bitbucket설치 전 Configuration을 진행 후 웹 UI로 접근하여 설치합니다.
- Bitbucket DB 구성
- DB 생성
- DB 유저 및 패스워드 구성
- DB - User 권한 매핑
- Bitbucket 구성
- Bitbucket Tomcat 설정
- Bitbucket 설치
💡
본 가이드는 Crowd 서비스 구성 및 설치 가이드에서 생성한 PostgreSQL DB 인스턴스를 사용합니다.
(설치 및 설정 가이드는 여기서도 제공합니다.)
(설치 및 설정 가이드는 여기서도 제공합니다.)
3. Bitbucket 설치 환경
OpenStack을 사용한 Private Cloud 환경
Bitbucket Instance 구성 정보
- OS: Linux Ubuntu-jammy-22.04 (Cloud Image)
- JDK: OpenJDK 11.0.17
- Bitbucket: Bitbucket 7.21.7 LTS
Bitbucket DB Instance 구성 정보
- OS: Linux Ubuntu-jammy-22.04 (Cloud Image)
- Database: PostgreSQL 14
💡
Bitbucket Server 플랫폼 요구사항은 Atlassian에서 제공하는 Docs를 참고.
4. PostgreSQL 구성
4.1 PostgreSQL 설치
apt update && apt install -y postgresql-144.2 PostgreSQL 외부 접속허용 설정
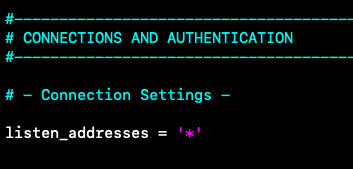
vim /etc/postgresql/14/main/postgresql.conf- Listen_addresses을 localhost 에서 * 으로 변경
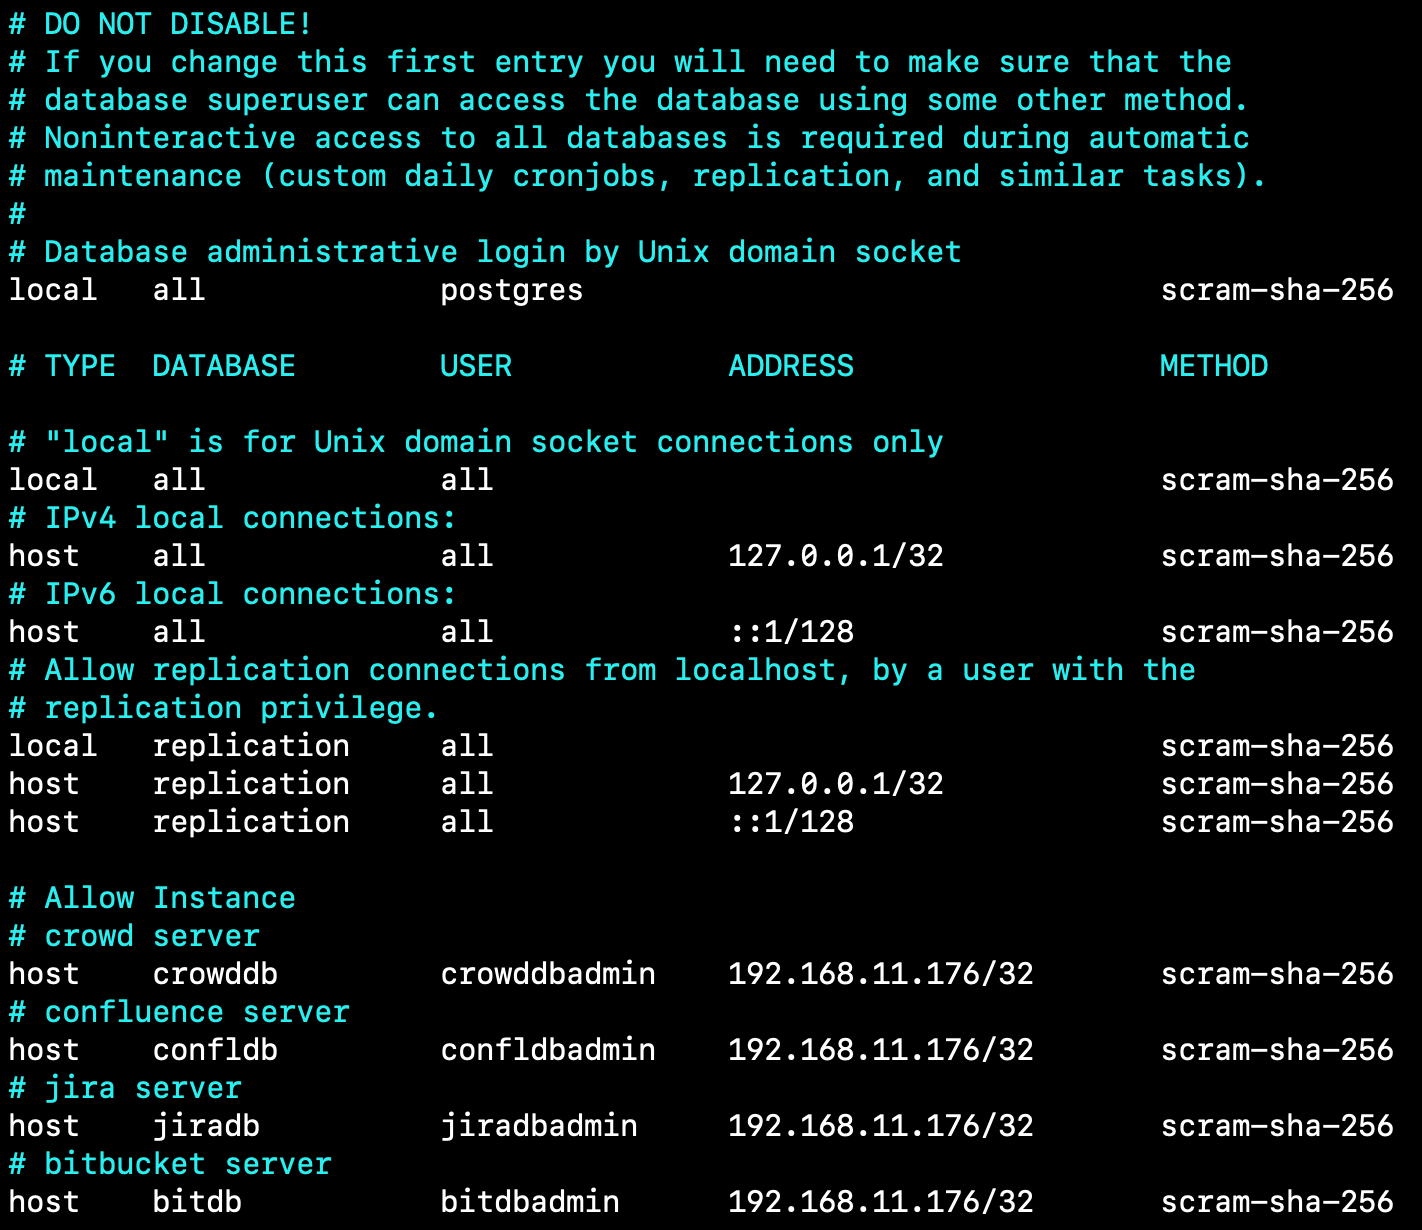
vim /etc/postgresql/14/main/pg_hba.conf- Bitbucket 인스턴스에서 접근 허용할 정보 입력
💡
설정을 위와 같이 변경합니다.
→ Bitbucket 서버에서 접속할 때 scram-sha-256 암호화를 사용합니다.
(설정 변경 전 PostgreSQL의 기본 계정인 postgres 계정의 패스워드를 설정 해야합니다.)
→ ADDRESS 부분은 Bitbucket Server IP로 지정합니다.
pg_hba.conf 파일 설정에 대한 부분은 PostgreSQL 공식 Docs에서 확인가능합니다.
→ Bitbucket 서버에서 접속할 때 scram-sha-256 암호화를 사용합니다.
(설정 변경 전 PostgreSQL의 기본 계정인 postgres 계정의 패스워드를 설정 해야합니다.)
→ ADDRESS 부분은 Bitbucket Server IP로 지정합니다.
pg_hba.conf 파일 설정에 대한 부분은 PostgreSQL 공식 Docs에서 확인가능합니다.
4.3 PostgreSQL DB 구성
CREATE ROLE bitdbadmin WITH LOGIN PASSWORD 'bitdamin' VALID UNTIL 'infinity';
CREATE DATABASE bitdb WITH ENCODING='UTF8' OWNER=bitdbadmin CONNECTION LIMIT=-1;
공식 PostgreSQL 설정 가이드는 Atlassian Docs 참고
5. Bitbucket 구성
5.1 OpenJDK 11 설치
apt install -y openjdk-11-jdk5.2 JAVA_HOME 환경변수 설정
- OpenJDK 설치 위치를 확인 합니다. (기본적으로 /usr/lib/jvm 에 존재합니다.)
dpkg -L openjdk-11-jdkecho "export JAVA_HOME='/usr/lib/jvm/java-11-openjdk-amd64'" >> ~/.bashrc5.3 Bitbucket 7.21.7 LTS 설치파일 다운로드
https://www.atlassian.com/software/bitbucket/download-archives
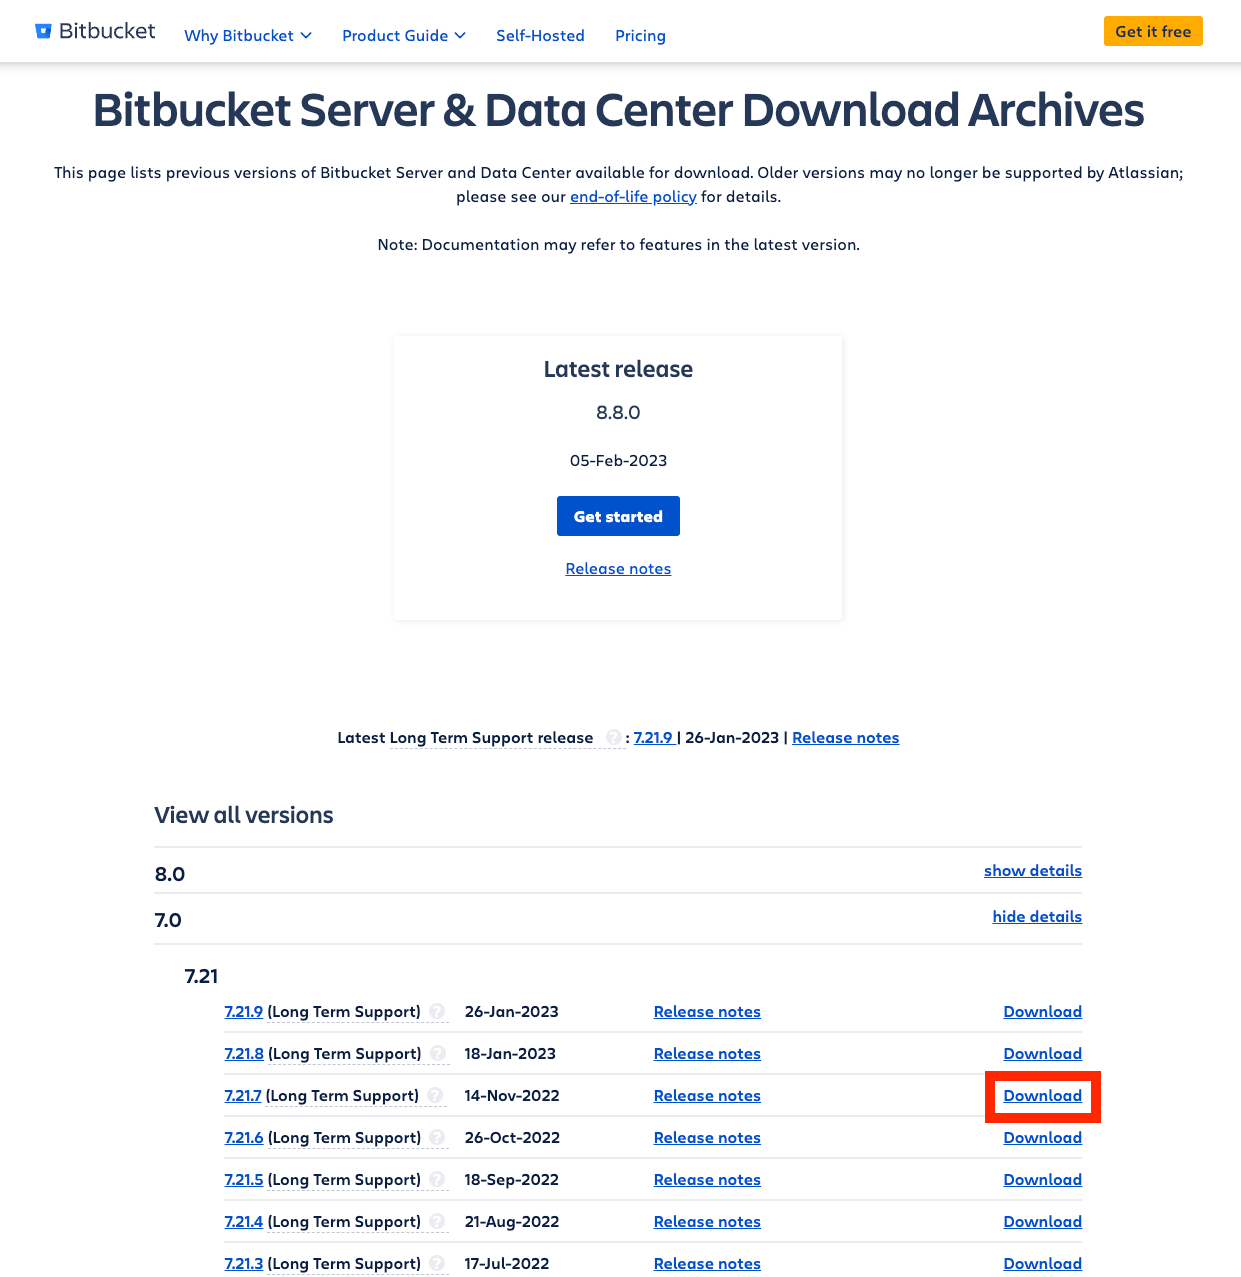
- wget으로 다운로드
wget https://www.atlassian.com/software/stash/downloads/binary/atlassian-bitbucket-7.21.7.tar.gz5.4 Bitbucket 설치
- Confluence가 설치될 Confluence 홈디렉터리 생성 및 다운받은 설치파일 압축 해제
mkdir -p /Atlassian/home-dir/bitbucket-home && \tar -xvf atlassian-bitbucket-7.21.7.tar.gz -C /Atlassian- bitbucket user 생성
useradd -d /Atlassian/home-dir/bitbucket-home -s /bin/bash bitbucketbitbucket user에게 디렉터리 권한 할당
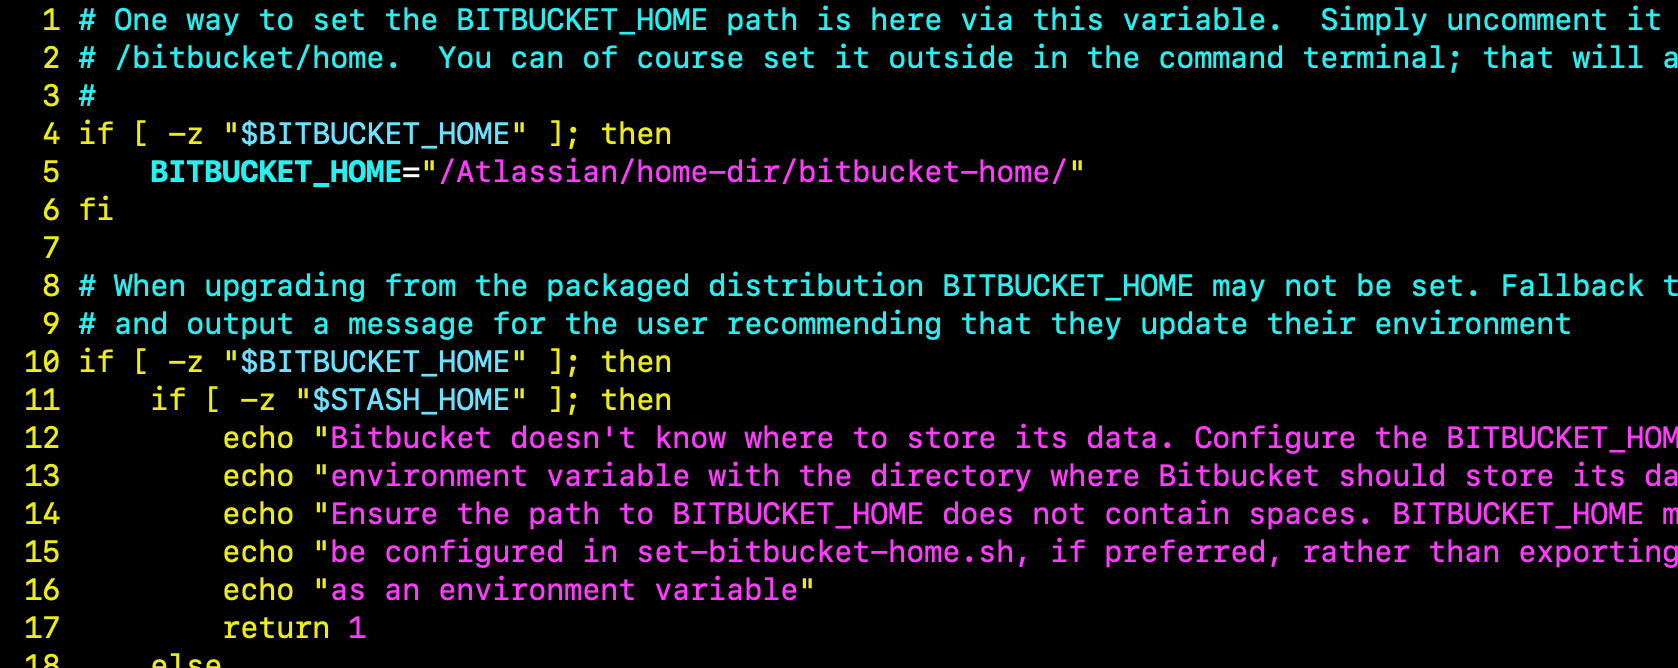
chown -R bitbucket:bitbucket /Atlassian/home-dir/bitbucket-home /Atlassian/atlassian-bitbucket-7.21.7 && \chmod -R u=rwx,go-rwx /Atlassian/home-dir/bitbucket-home /Atlassian/atlassian-bitbucket-7.21.74. 설치 전 confluence-init.properties 수정
vim /Atlassian/atlassian-bitbucket-7.21.7/bin/set-bitbucket-home.sh(아래 사진과 같이 BITBUCKET_HOME 지정)
- 초기 설치 진행
# bitbucket 사용자로 설치
su bitbucket
bash /Atlassian/atlassian-bitbucket-7.21.7/bin/start-bitbucket.sh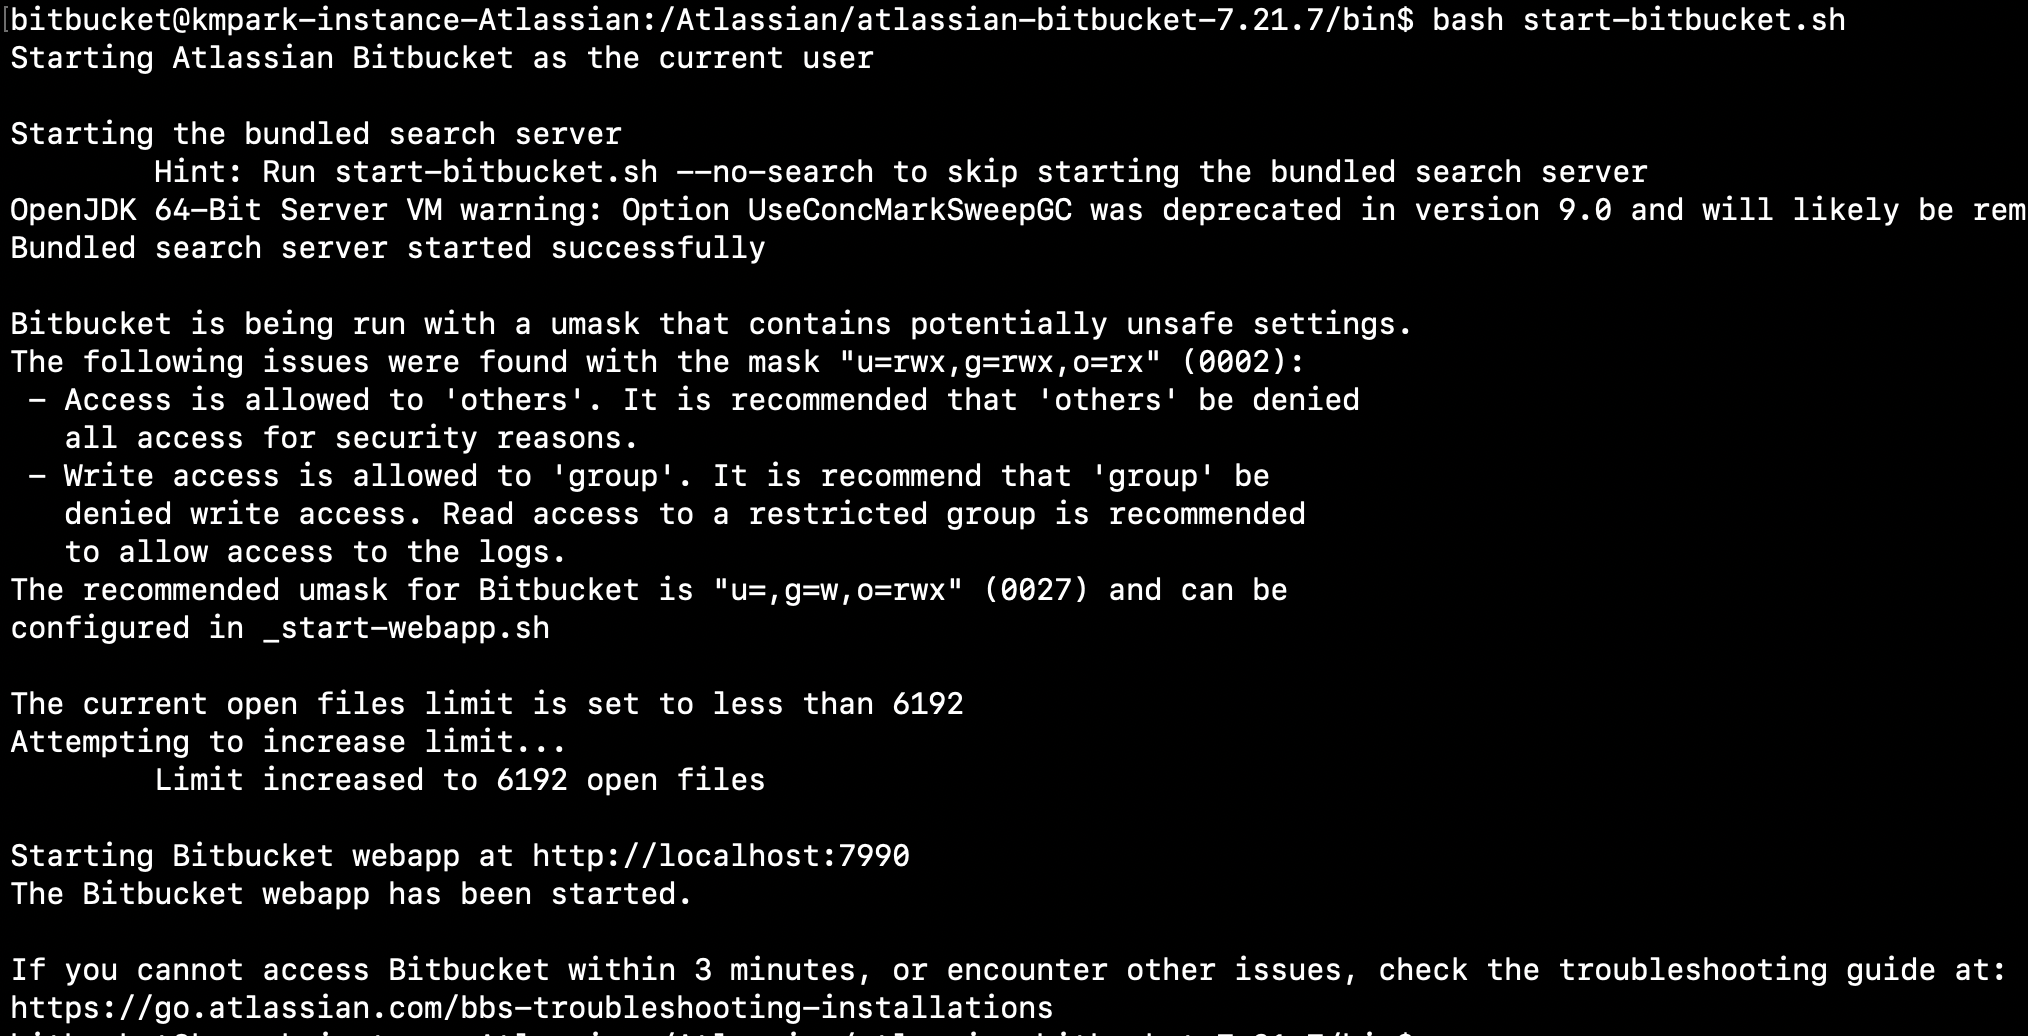
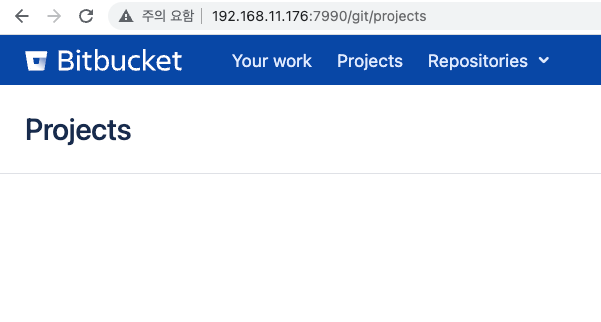
http://<Bitbucket-Server-IP>:7990접속
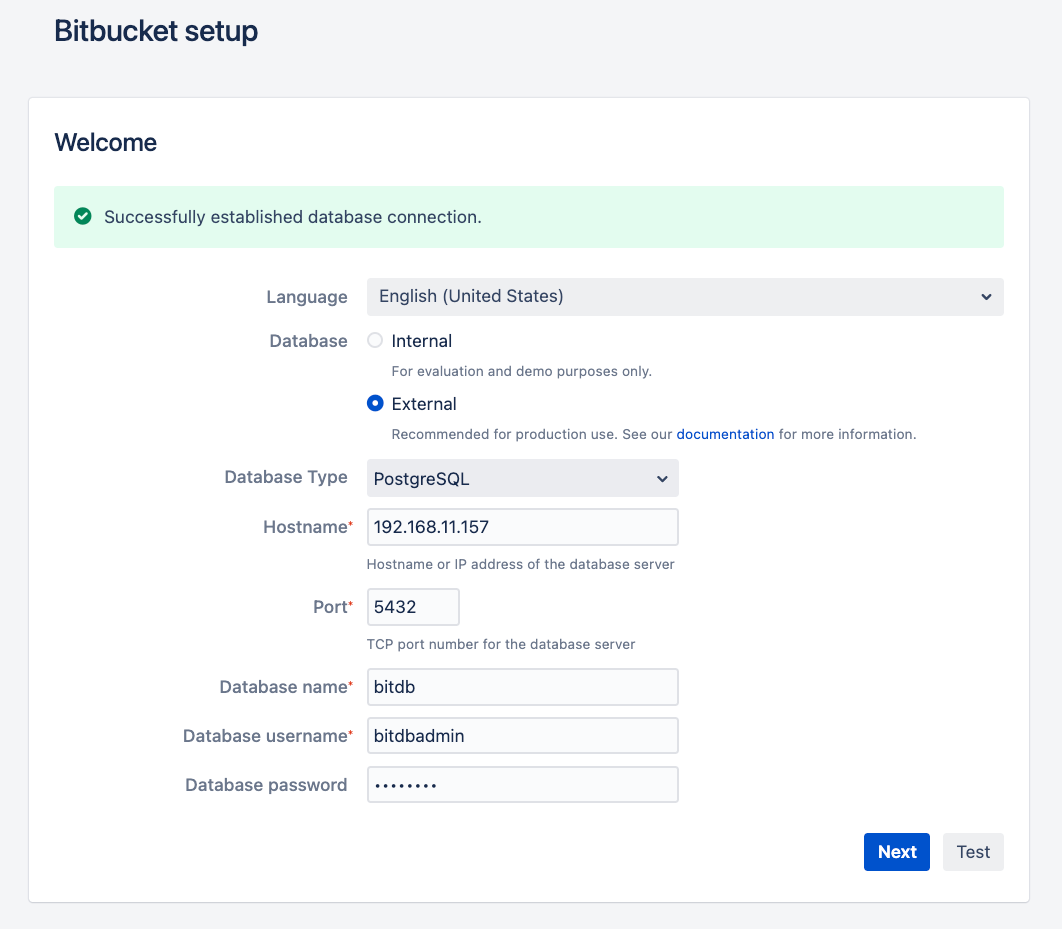
External선택 후 DB 정보 입력
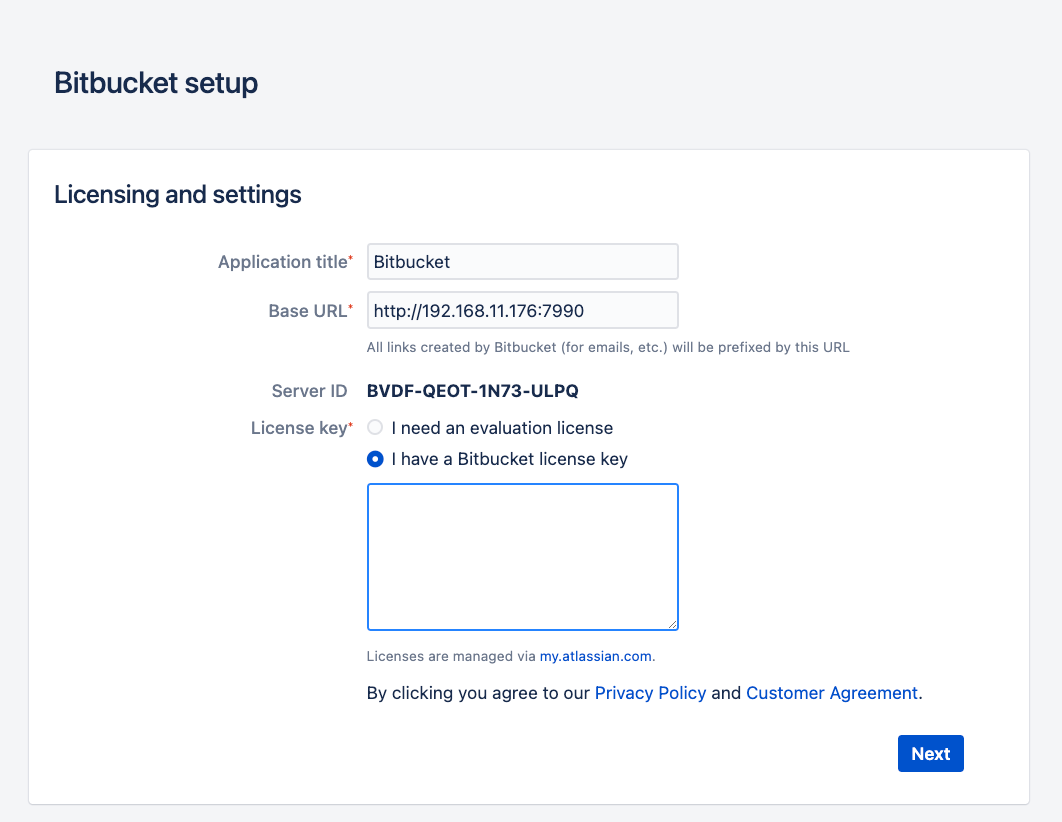
- 라이선스 키 입력
Atlassian Trial License 발급
방법 Log in with Atlassian accountLog in to Jira, Confluence, and all other Atlassian Cloud products here. Not an Atlassian user? Sign up for free.Atlassian my.atlassian.com에 들어가서 회원가입 또는 로그인 하여 Atlassian 제품군의 Trial License(평가판 라이센스)를 발급할 수 있습니다. 💡모든 Atlassian 제품의 Trial License 발급이
평가판 라이선스 발급 방법
- 관리자 계정 설정
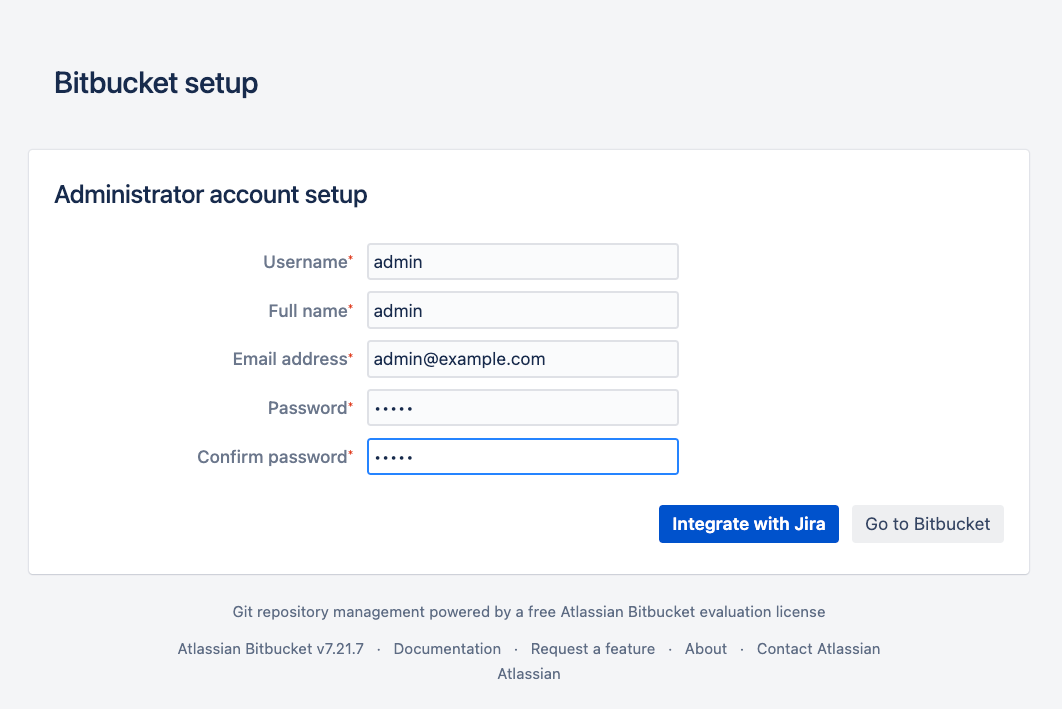
- 구성 완료
(선택사항) Context Path 변경
- Bitbucket 중지
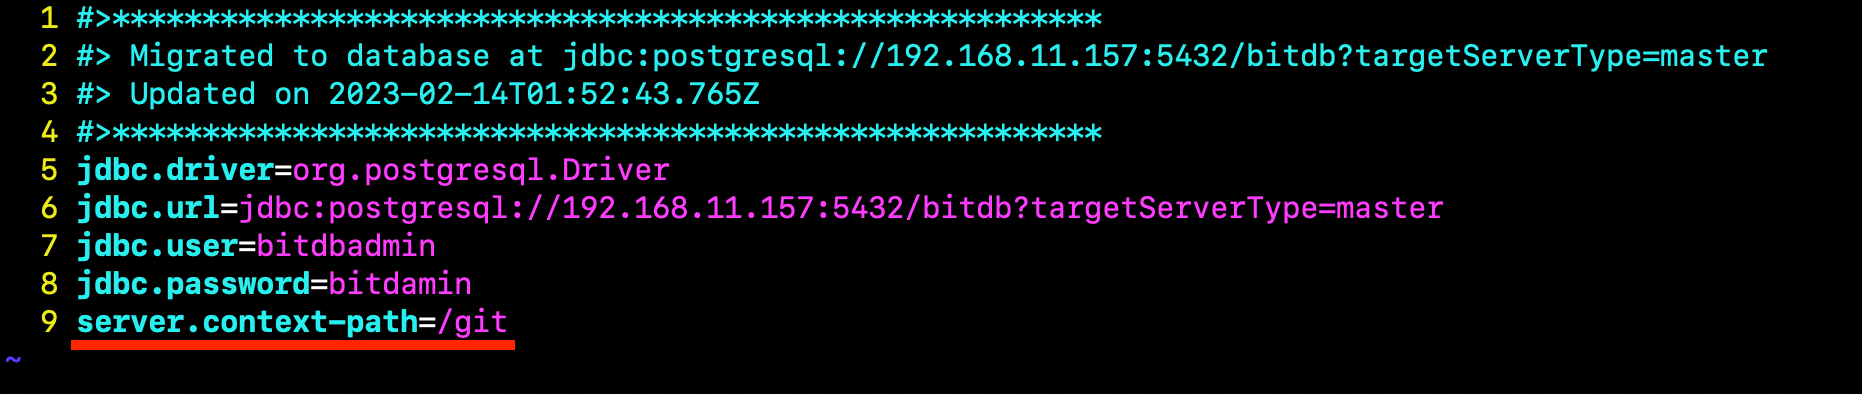
bash /Atlassian/atlassian-bitbucket-7.21.7/bin/stop-bitbucket.sh - bitbucket.properties 수정
vim /Atlassian/home-dir/bitbucket-home/shared/bitbucket.properties(아래 사진과 같이 server.context-path=<path> 추가)
- Bitbucket 시작
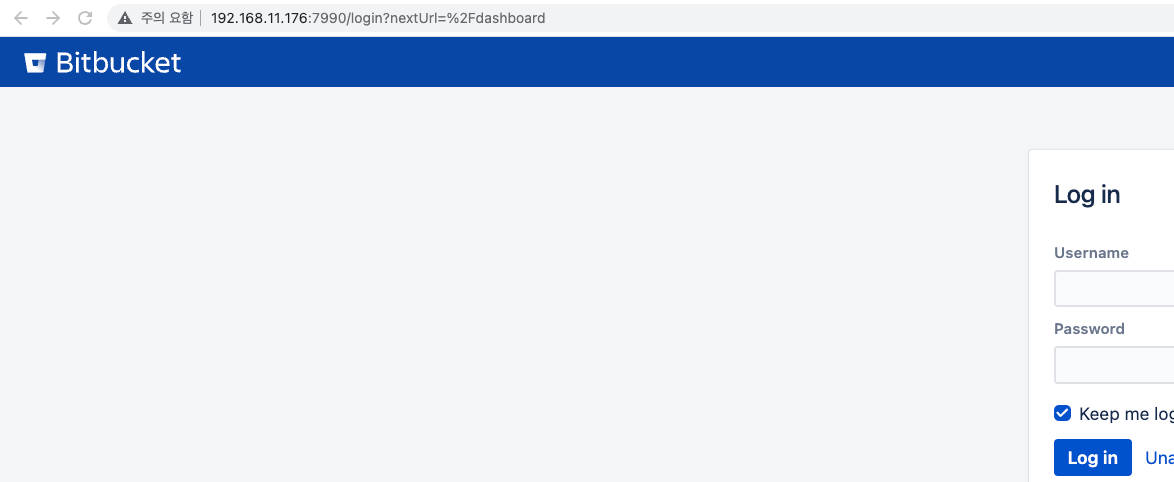
bash /Atlassian/atlassian-bitbucket-7.21.7/bin/start-bitbucket.sh- Bitbucket BaseURL 설정 변경
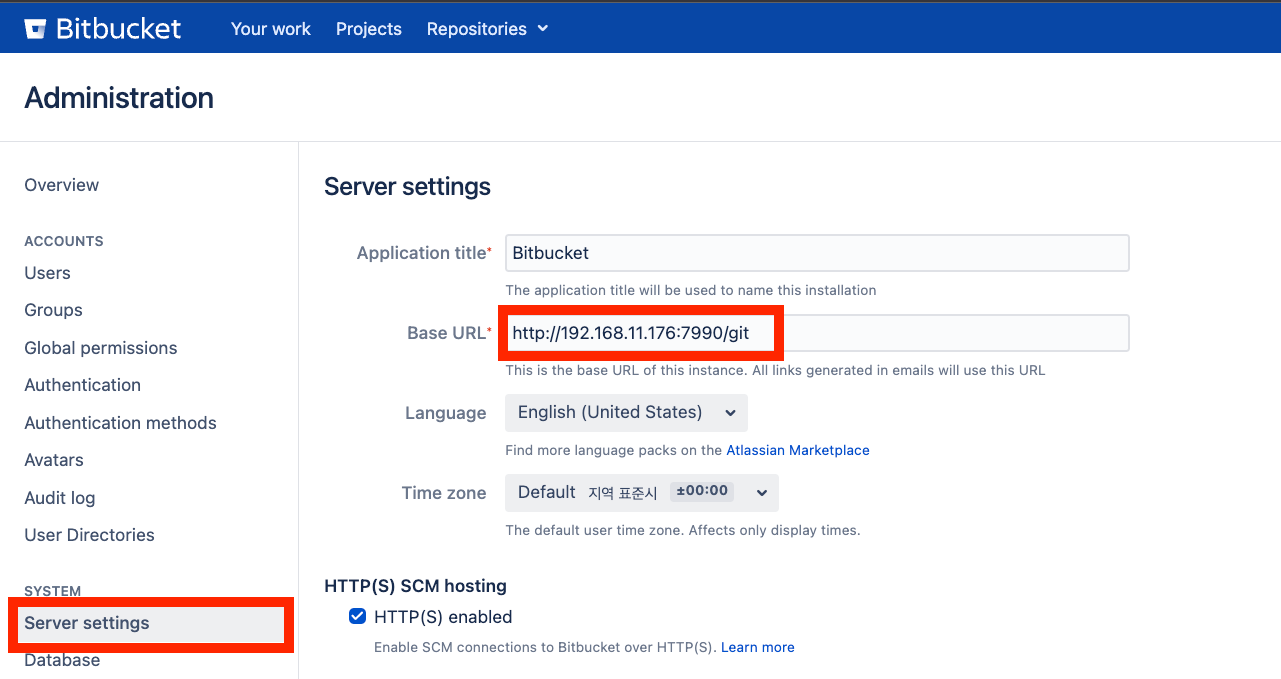
- 정상 동작 확인
6. Apache Proxy 설정
이전 Apache - Tomcat(Confluence, Jira, Crowd) 연동 가이드 포스트에서 추가한 방식으로 Apache에 Proxy 설정을 추가합니다.
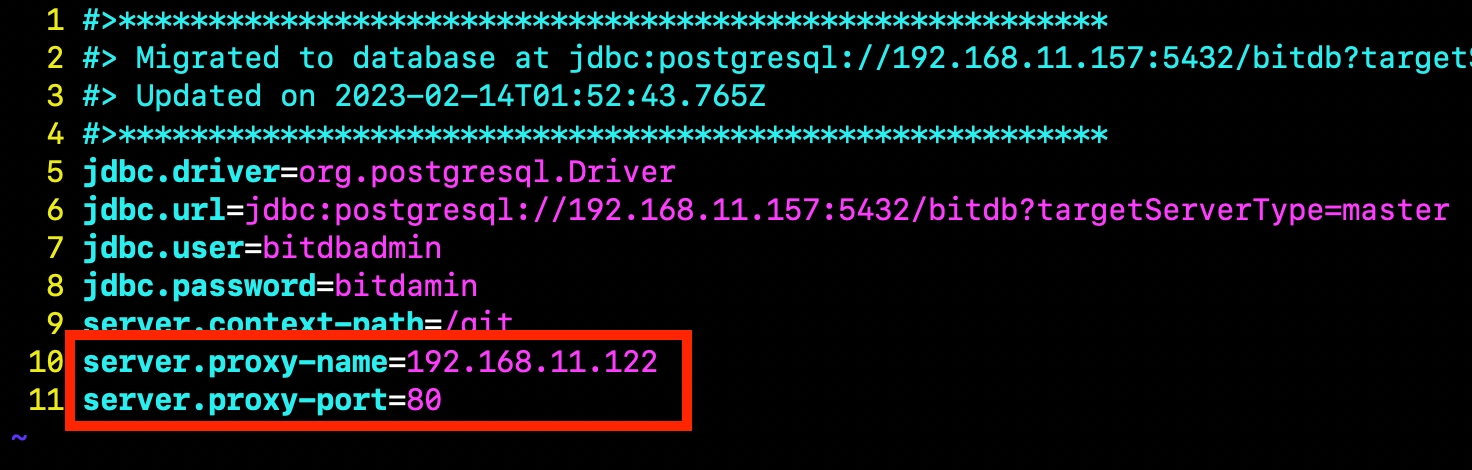
6.1 Bitbucket 서버에서 bitbucket.properties 수정
vim /Atlassian/home-dir/bitbucket-home/shared/bitbucket.properties(아래 사진과 같이 server.proxy-name과 server.proxy-port를 추가합니다.)
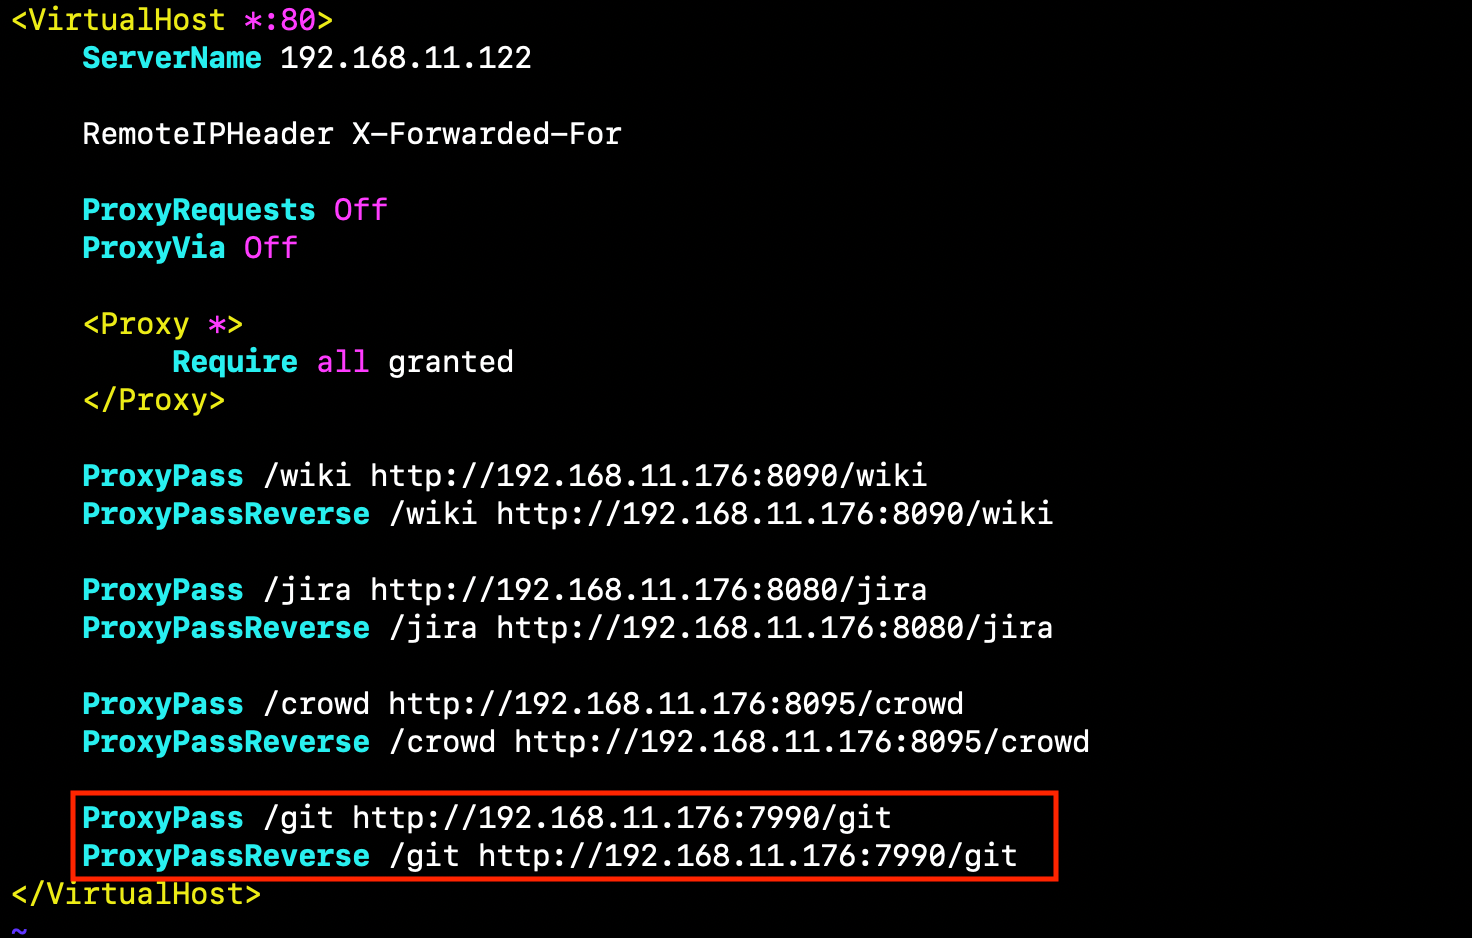
6.2 Apache 서버에서 001-atlassian.conf 수정
아래 사진과 같이 ProxyPass 와 ProxyPassReverse를 설정합니다.
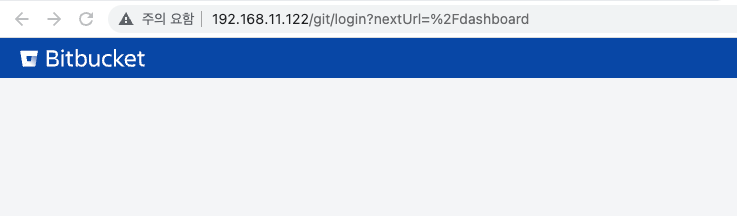
6.3 정상 적용 확인
Reference
- 공식 설치 가이드
Install Bitbucket Server on Linux from an archive file | Bitbucket Data Center and Server 7.21 | Atlassian Documentation - Connect Bitbucket to PostgreSQL
Connect Bitbucket to PostgreSQL | Bitbucket Data Center and Server 7.21 | Atlassian Documentation - Change Context Path
Change Bitbucket's context path | Bitbucket Data Center and Server 8.16 | Atlassian Documentation - Running Confluence behind Apache
Proxying Atlassian server applications with Apache HTTP Server (mod_proxy_http) | Atlassian Support | Atlassian Documentation server.xmltobitbucket.properties
Migrate server.xml customizations to bitbucket.properties | Bitbucket Data Center and Server 8.16 | Atlassian Documentation
Member discussion